Monday, December 8, 2014

It's Giveaway Day!

Over at SewMamaSew, they're hosting "Giveaway Day", so I thought's I jump in.
Because I don't already have enough to do, right?


Enter to win free motion quilting on a mini project of 
36" x 36" or less~
Winner must submit quilt top, batting and backing  by 12/31.
[Postage paid by winner]


So, here are the rules:
Leave a comment her for one entry.
Leave a comment on my Instagram @petaquilts for another entry.   See that little icon up top? well, click it!
Overachiever?  tag 3 friends on IG for another entry.
Heck, are you REALLY an over achiever?  leave a comment on my Pinterest!

OK....GO!

Saturday, November 15, 2014

Handmade Hanukkah: Table Runner Edition

In continuing the holiday theme, I present......

Hanukkah Table Runner

As part of the SewMamaSew.com "Handmade Holidays" series, I searched for fun, fresh handmade projects to celebrate the Jewish holiday of Hanukkah.   It was a bit of a challenge. 

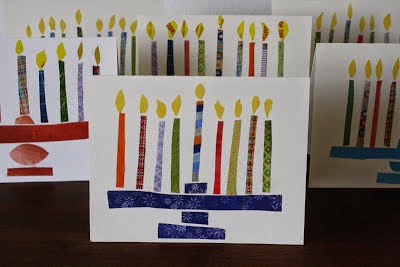
I did find this blog post, with  wonderful handmade Hanukkah cards.   I love the idea and the design so much, that I needed to make it into some kind of hand-sewn project for the upcoming Jewish holidays.

photo courtesy of BagelsandCrawfish.blogspot.com

The kind folks over at BagelsandCrawfish gracious provided permission for me to use their cards as inspiration for my projects.  Hop over here to read more about how they made these delightful cards.


What you'll need:
  • 1 fat quarter for background
  • assorted scraps for candles
  • 5" square of orange for flames
  • large scrap for menorah
  • iron on fusible such as Steam-A-Seam Lite or similar
  • 1 yard or 2 fat quarters for table runner
  • backing 20" x 63"
  • matching thread


To begin the project, I selected a white background from my fat quarter stash collection, and spend a few minutes poking through my scrap bin to find some bright, colorful pieces for the candles.  It really evoked my memories of the brightly colored candles we used when I was young, and still use today.   
The candle scraps  were about 1-2: wide and about 6" long.    For the menorah base, I sue a fat quarters I'd been saving for something special - this project definitely qualified.

Prepare your background by marking the center.

For the menorah base, cut a piece of fusible about 4-6" wide x 12"  long
Fuse to the WRONG side of the fabric,
From the fused fabric, cut the pieces for your menorah base as desired.
Arrange your pieces, centered on the bottom 1/3 of your background.


Once you are satisfied with the placement, remove the paper backing and fuse the pieces to the background following the manufacturer's directions.

For the candles, iron fusible to the scraps you selected and cut them to about 1" x 6"
Cut one slightly large candle for the center "shamash" candle.
Finally, cut 9 teardrop shapes for the flames - this is much easier when the fabric is pre-fused (ask me how I know)

I wanted to really highlight the "handmade" look seen in the cards, so I paid special attention to making the candles not appear perfectly straight.

Once all of the candles and flames are firmly fused, you can do a number of creative things with your fabric menorah.  I decided on a table runner.

Trim the menorah block square; mine turned out to be 20: x 20"


To complete the table runner,  I then added a 20"x 20" section of novelty fabric on each side.   Two fat quarters could be substituted also
I backed it with leftover holiday fabric sections measuring 20" x 63", leaving a 6"-8" section open for turning.
Finish off by whip stitching the opening.

I will be quilting the table runner, so I left one short side open to allow for batting.

For more information about the Jewish Holiday of lights, and the traditional prayers said over the candles each night, click here.

Happy Hanukkah!


Friday, November 14, 2014

Oooh, Look! Sparkly!

It's that time of year again.

We're getting a little tired of Pumpkin Spiced anything,  and the poor Thanksgiving turkey is sobbing in the corner because he got squeezed out between Halloween and the looming Christmas festivities.

And those of us who celebrate Hanukkah, the Jewish Festival of Lights,  often wonder where "our" holiday decoration are.

So this year, I'm doing something different!


In searching for inspiration, I came across a lovely paper piecing pattern by Marsha Hohn at Quilter'sCache for this "menorah" block*. At first, I noticed how many little pieces there were!   But following the numbers in this pattern, it went quickly, and easily.....
and turned out looking wonderful!

After completing the block,  I did some stitch in the ditch around the menorah and candle.   To add some texture, I did some free-motion quilting to the background in a matching tread,
I decided it stood very well on its own, so I simply added a facing, instead of the more traditional binding.
It turned out  great, and will make a darling mini wall hanging to add some special sparkle to our house this Hanukkah!


*Permission generously provided by Marsha Hohn of  QuiltersCache.com


Tuesday, October 28, 2014

Wordless Wednesday: Bloggers Quilt Festival Edition


Vote for your favorite quilt here

Blogger's Quilt Festival ~ Fall 2014

I've quietly watched the Blogger's Quilt Festival for years while quietly sewing at home.   It's finally time to enter....


Yes.  I I've gathered up the confidence, so here goes.

In the Modern category, I'm entering this lovely wall quilt I completed after taking a class called "Make Mine Modern" with the lovely and talented Dawn Cavanaugh at MQX in Springfield just a few weeks ago.   

You see, for years, I thought I wasn't "following the rules" and was embarrassed that I never seemed to like to follow the directions. Once I found the Modern Quilt movement, and my guild, The Chicago Modern Quilt Guild (my tribe!!), I realized there were a lot of people who didn't always like to follow the rules.
Taking this class really allowed to me LET IT GO!  and do the kind of quilting I've always wanted to be, was kind of afraid to. 

getting ready to QUILT!

So when Dawn said "Make it Modern", well..... I DID!     And, I love how it turned out!

so here's a sneak peek of my favorite detail:
petaquilts: 2014

Since I really wanted to spend my time playing with the quilting, I didn't stray too far from the sample design provided for class. Thought I did take several groups of fabric, and stressed a little about which combo was best.    I love the way these colors work together.

This class also allowed to pull all the tricks and tools together to create the quilting I wanted.  Using both the blue (water) erasable pens, and the purple (air) erasable pens, I subdivided the negative space to provide many different sections to try out various free-motion designs.    SOme desings came from our class discussions, others from my own bag of tricks, and still others from the lectures I;d attended the previous day with Angela Walters.    Can you say FUN?!?

And so,,,,,here it is!   

Make it Modern ~ Peta's Way ~ 2014


Thanks for reading
 I hope you enjoyed hearing about my quilt!

To see more quilts in the Blogger's Quilt Festival click here


Friday, June 6, 2014

Selvage Saturday

So excited to make up a couple of samples for a quilt buddy's booth at an upcoming quilt show. As I helped organize her fabric bundles, and other drool worthy ware for her set-up, I came across this book:
Save the Selvages!


I've been fascinated by selvage projects and hoarding collecting the colorful edges till I found a worthy project.    I flipped through this book and it was hard to choose just one!   For time sake, I selected two easy projects I knew I could quickly finish up for her.


When working with selvages in the past, my created fabric turned out curvy and and impossible to get flat.   One great tip in the book worked wonders for getting my work to lay perfectly flat: foundation piecing.


Once I got to working, it was so much fun, churning out these darling projects became almost infectious!    It was hard to stop.   I can't explain this fascination - it might be the explosion of colors -  but who am I to argue.   Once I completed the samples, I knew I would have a hard time parting with them, so I just keep on going, and going, and going.


I've collected quite a selvage stash.  As I was sewing, a little bulb went off in my head.    Die cut shapes are another fascination of mine, and I wondered what would happen if I combined the two.    So here are few giant selvage hexies!

I have a few ideas of how to build a quilt around them, though it will need some tinkering.   Stay tuned to see what these lovelies turn into.


So if you see these little gems at a quilt show soon, give them a little wave,  OK?

Thursday, June 5, 2014

GIfts: Memory Quilts Revealed - Part 2

Saying goodbye to Harley
A few months ago, another pug in our circle  left us suddenly. Harley was another distinguish gentlepug who found his family through rescue.  Along with his fur sisters, Sophie & Dixie,  he made a cross country move and welcomed a furless pup named Effie in the last year.

Harley struggled with several chronic health issues, but his decline was very sudden. We we all shocked by news that he had passed away.

Our group felt his family would be too saddened by a large quilt.  The decision was made instead to present them with a pillow in his honor.  Taking my design cue from his mother's wedding scheme, I created a custom pillow with a favorite photo on the front, and a custom label with all the donors on the back. This allowed a large donation to be made in his honor to his pug rescue group, Kentuckiana Pug Rescue.

And here's how it turned out:


I had the opportunity to hand deliver this gift.   While I wasn't able to smuggle Miss Effie home in my purse as hoped, I enjoyed meeting her in person!


Effie:   Wanna play Sophie?
Sophie: NO!

Photo label including all donors


Friday, May 2, 2014

Finish it Up Friday Special Edition: Memory Quilt Revealed

I've been working on some special projects lately. But, they were gifts and until given, could not be shown. Oh how painful it was not to share my progress on these!

Photo by Frolic Photography 2012


Quilt for Trunks
Trunks was a very special pug I came to know through my "pug support group".  Initially through a circle of pug bloggers, and eventually a group on Facebook, we shared our collective love of our pugs, and all things pug. We visited each other and planned events across the country. We didn't chose the pug life...they say, it chose us.   
Of course all pug are special, but there was something so endearing about Trunks, and his mother Demarus.  His mom had a very special love for my senior pug, Foo and we joked about the two "courting."  Our group shared the often silly antics of our pugs, new pugs joining our family, pug gatherings and events. We shared  the unusually high maintenance required by our snout less buddies, and the health concerns unique to our pugs. Occasionally, we shared the loss of a beloved pug.

When Trunks was diagnosed with mast cell rumors, we shared his brave fight against cancer. Once, twice, three times he underwent surgery.   Our circle had fundraisers to make sure he received the chemotherapy he needed.  While his life was extended considerably, he lost his battle with cancer last June.  Our group was collectively heartbroken.

As with so many pugs before him, our group pulled together to create a memory quilt for his family.  Funds were donated to pay for the quilt, with the overage donated to the local pug rescues in Trunk's honor. That's where I come in.  Over the course of many months, I selected a pattern and fabrics that would reflect this handsome  and gentle pug.   A series of photos were then selected and printed onto fabric to be woven into the design. I created a customized label to include all the people who participated. The quilt top was assembled, and finally, quilted.  

Here's what the process looked like.

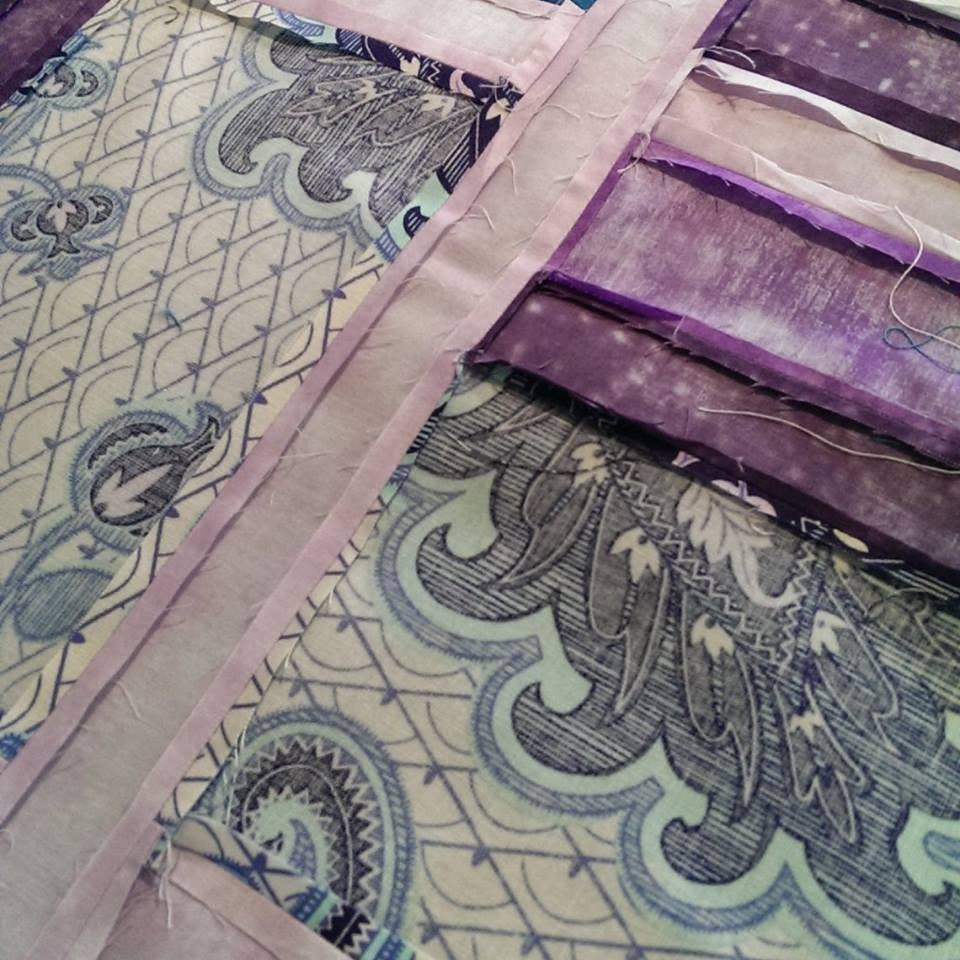
For this quilt, rather than create my own pattern, I used a great pattern I found in Quilts and More Spring 2013 (pg 85). This made the process much, much easier. While it was more formal and  boxy or structured than I would  normally choose, the large rectangles in the blocks offered the perfect place to drop photos.  Knowing Trunks' mom's love of purple. the  fabric combinations practically jumped of the shelf at my local quilt shop.

The quilt called for 20 blocks. I knew I wanted to use 7 photos, so I made up 13 blocks as instructed. For the remaining 7,  I substituted photos printed onto fabric.


For the back, I'd love to say it was a planned design.   What it was, was poor measurement.   I realized in the 11th hour that it the cut I had would cover only 80% of the back.   So much for my plan of an easy applique of the label.   Using some of the leftover blocks and scraps from the front, I created a band to highlight the quilt label.
For the final photo, I placed  a lovely one
of Trunks with his Mom on the custom label.
With coordinating fabrics,  I extended the backing on hand to fit.  


detail: custom quilt label


I had so much fun quilting this!!   Taking my cue from the large motifs in the focus fabric, I allowed myself to do a medium density doodle style free motion design.   

I had the pleasure of hand delivering this memory quilt to his sweet mom last weekend.
Free motion quilting echoed the
designs of the focus fabric


Goodbye for now, Trunks! 
We'll see you on the other side of the Rainbow Bridge.

Thursday, March 27, 2014

My First Quilt Challenge: One Less Thing on My Quilty Bucket List!!


For many years, I dutifully bought the challenge quilt kit my guild offered each fall with the very best intentions.   With a deadline nine months away, the fabric usually fell off my radar, and I'd remember it a few days before the challenge quilt was due.  Some fabrics were intriguing, and suggested a clear design. Other instructions were amusing....but a quilt never got finished. And sometimes, a quilt never even got started!

Then, it became a mission. I was going to complete a challenge.   Except I forgot all about it. Again.  So when my Modern Quilt Guild was notified about an inter-guild challenge, my ears pricked up.

The challenge was entitled "Modern In The City", and it had two rules only.  One side had to be exactly 36 inches..........the other sides 36" or less.   That was it.    Not a lot to go on, yet, I had a very instantaneous and clear vision of my design.  I even knew just how to execute it, and which fabrics I'd been hoarding..collecting to make it work.

I mentioned the project to #2, who also had a very definite idea of what the project should look like.   She explained that it should have one half devoted to one subject, and the other half to another.  Then, overlying the two halves, should be two images, connected by a symbol.    I'm being vague here on purpose....work with me.    The eerie part was, she'd just described the exact design I had seen so clearly in my head.

The challenge "Modern In The City" immediately begged the question: which city?  After more than 25 years, I have come to love my adopted city of Chicago.  But, I will always call New York City my home.  Images of New York city [in the 70s & 80s] form the cornerstone of my growing up years. Chicago's proud landmarks and diverse neighborhoods define my adulthood.  The  design reflects how both cities have become an inextricable part of my personal history. 

This challenge was a little different; it did not include any fabric at all.  I was both totally free, yet constrained by keeping consistent with the image in my head.   I headed to my stash.   I was well stocked for part B.....but fabrics for part A? Not so much.

But my quilting community had my back.   A quick post on one of my Facebook Groups, Chicago Stitch Bitch & Brew [because I'm classy like that] yielded excellent results!  Which led to Modern Yardage....who had a fabric that was OK, but not quite perfect.   So I asked if they could change it. And they did.  Within about 1 week.

Once I had all my fabrics and supplies, I had to execute.   As usual, I am Goddess of the Last Minute...I'd like to say that I purposely saved this project for my undivided attention at my quilt retreat.  If you know me, you'd know that utter BS.  What happened is I got busy and distracted with day-to-day management of my hectic life, and wound up with 48 hours left to get this baby DONE.

I began by selecting my fabrics and cutting strips.   But no....I was unable to force myself to make strips on the grain.  That would have made the patterns look sideways.   So, I cut all dozen directional fabrics on.the.bias.   If you aren't aware, bias cuts provide lots of stretch and flexibility. Useful for bindings, especially on curved edges.   Painful if you are trying to create a flat, even, quilt top.

So the quilt put up a fight from the very first cut.  And it did not give up. But, neither would I.   I located two perfect images online, and was able to recreate them as fusible applique pieces.   The central icon would be out of organza because I wanted it to be translucent.

Finally, all the elements of the project were complete.  I put the quilt on the long arm!  And by finally, I mean at about 9 pm the night before the deadline.   My idea for the quilting didn't look at all how I had hoped - but with my time dwindling, I decided to adopt the "less-is-more" design aesthetic. It was time to join all the parts!  And, they came together exactly on plan.

At that point, I felt the quilt would look best with no border at all. So I figured it wan't too late to learn the new technique of quilt facing.   Except for the fact that when I measured the quilt, it was exactly 36".   Lesson learned - make sure your project exceeds required measurements before the last step!

With just a few hours left, I wasn't about to let a silly binding keep me from my goal.  I pushed through, and added a coordinating binding.    Just enough time for pictures!     And so, I give you:

Two Cities, One Heart


detail view, Chicago side
Today, I was notified that the IQF judges were so excited about the challenge entries that all submissions will be displayed in Chicago at the June 24-26 show and travel to multiple events.  
Wow.  
Goal: Surpassed.


For a closer look at some of the NYC fabrics, and to order, visit City Quilter.
 Also see this post about some of the fabrics.


Wordless Wednesday: What's on the quilter


Tuesday, March 18, 2014

Crafty Jewish Quilter 2014 Swap Update

Announcing: A Give-Away!
When I shared this swap with the fine folks over at 1-800-Dreidel.com, they generously offered a lovely fat quarter bundle as a giveaway for the swap!  
How sweet was that?   
Take a moment to peek at their website for a wide variety of craft items with a Jewish theme.  

Quilters participating on the swap are a small, but mighty group.....so if you are interested in joining the fun, and can get a small quilted gift ready in time for Pesach, there is still time to join our swap.


We've still got about a month until Passover! 
Sew....get quilting! 

Remember:   Handcrafted items under $20.00, arriving by April 12.


Sunday, March 2, 2014

Announcing: The First Ever Crafty Jewish Quilter Swap 2014


When I posted photos of some of my works-in-progress over the Thansgivmukkah holidays, I was truly surprised by the great response to my projects.    I didn't realize how many members of "the tribe" are in my circles.


Thus, I am creating the first ever  
Crafty Jewish Quilter Swap 2014!  
And just time for Passover 2014. which begins on April 12 this year. I'm asking crafters and quilter who want to join in to make a fabric item that reflects a Jewish holiday and can be used to decorate a holiday table or serve a function in making a holiday meal.  Some items that would be appropriate are:

    • potholder
    • oven mitt
    •  table runner
    • set of napkins
    • wine coasters
    • casserole cover
    • matzoh cover
    • seder plate mat
I found some great ideas on two sites you may find helpful if you are stumped for an idea.  One is Joyful Jewish and the other is SewJewish.
Sew....let's get creative!!

It's simple. Submit your  name, email address, blog (if you have one) to participate by March 9, 2014.
Each crafty-quilter will be randomly * paired with another participant.  Be sure to mail your swap item in time for arrival before Passover begins on April 12, 2014!
Send your info to me at petaquilts@gmail.com, or leave it in the comments below.

Rules (suggestions)
  • Be creative!!
  • Keep costs below $20
  • Please mail your swap on time so this it arrives by April 12!


And, by "randomly" I mean: tossing the crumpled up names on the floor and letting the dogs pick the pairs!